After been back for 2 weeks i bought one of my dream gundam model,
gundam 00 raiser perfect grade. Bought from grafiti toys at times square, comes with free stand for the model, cost? RM 800. It was a nice nice day at first was a little bit sayang to fix it but, wanna display it in my cabinet and the box was too big so here are some pictures

the box and in front is strike freedom

the back of the box
within the big box, hav 2 smaller

the main model 00 gundam

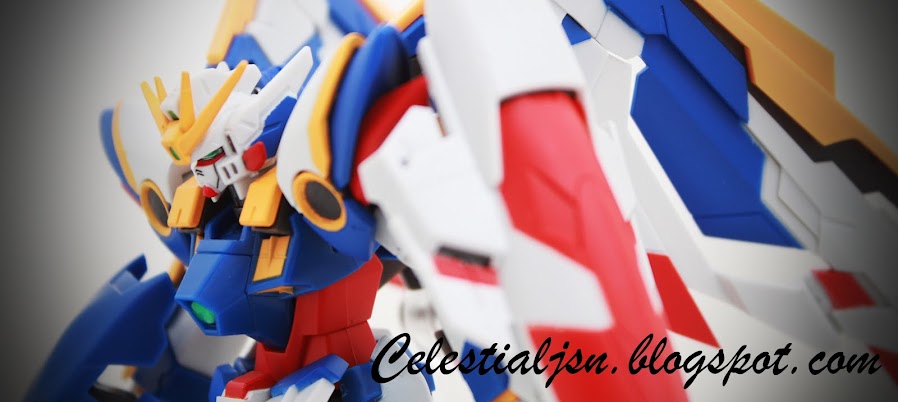
the plane 0 raiser together they will be combined to form
00 raiser

the GN drive, this is the part that i like the most haha

the 2 GN drive unit

as big as my thumb sia

batteries are included, it should be since it costs so much
so without any delay after opening the box i started to fix it,
those whom are pro with gunpla would probably cry when they
see the way i fix these, haha rough and extremely lousy, but
cant do much about it.

first there is 1 feet

then the other


then comes the legs


compare to those models which i originally collected the leg itself is already way taller, after the leg comes the waist


the chest unit is extremely difficult to fix, it was really frustrating to mend those parts but i managed somehow. and the most sad part of all

the head, while fixing this i wanted to pull out the red piece since i accidentally place the parts wrongly and i broke the antenna, T-T superglue seems to be a wrong idea. have to see if there are any spare parts out there

oh and inside the head there is a light bulb to light up the eyes.

and i got this far in 1 day.. morning til night.. sigh armless for now
also as u can see, im using the wrong tools also to cut the plastic parts,
which is a big mistake. and the next day~


the hand is also another annoying part, because there are 3 springs fitted in each at each circle part, in order to make the arm sturdy and able to stay in position, putting in those springs was a pain.

and yay armed and not dangerous
but not completed 1 more part


yes this is where the 00 comes in because it uses 2 GN drive, while other mobile suit in the anime uses only 1, so this is 2 times more powerful then other gundams, except reborns gundam which i will intro later on.

and finally the final part of the gundam

also with this, my scissors snapped in half and cant be used any more lolx 1 day use for a RM15 scissors, lousy. then my progress came to a halt for several days, due to laziness, and finally i bought a proper pair of cutters and completed the weapons and shield.

GN sword II

and thats all for today ^-^ coming next is 0 raiser and 00 raiser pictures